Simple update.
Decided to soundproof the floors a little. Used Dynamat Extreme.
So i went out and purchased a pair of Starlet door locks in order to have them matched to my key for my ignition barrel, at least that's what the plan was. I really like the idea of having the same key for as much as possible, the bootlid the exception.
I popped into a locksmith and soon found out that the keys and locks weren't compatible. He was happy to help me and told me that the Starlet key was known as a TOY26 size and the Glanza was a TOY38R size. I then looked into seeing what door locks were available in a TOY38R size and found nothing that would suit. Okay, so ill try looking into replacing the ignition barrel with a Starlet TOY26 size, but finding someone with stock was another issue.
It came down to calling around for people on Gumtree parting out Toyota Starlets hoping that the ignition barrel was the same size and match that to the door locks i had already purchased. I did find someone and quickly drove around to their yard with the ignition barrel already removed from their car. Unlucky for me the key and barrel were the same TOY38R size i had all along. I was dumb folded. This Toyota Starlet was an Australian Spec model but still had the wrong size key to the door locks i had purchased. After some heavy research my only conclusion was that 'Nice Products' produced door locks with a different sized key to the original leaving people in the dark having to use different keys if they were to replace their door locks. That sucks.
The Toyota Starlet at the yard was already stripped so i was having my doubts on solving this dilemma. I soon asked if they had the doors with door locks floating around still, long story short they were in 2 different workshops and the door locks were actually in decent condition but it took us 30mins driving around chasing these. Worth it!!!
Lucky again, the ignition barrel fits straight into the Glanza ignition barrel cast fitting. I moved onto cutting and enlarging the holes in the doors and worried about modifying the locking mechanism at the back later. (May make a blog about this)
Here are the photos. Probably should of done this before paint, but i did apply paint to these before final fitment.
Some quick exterior build up updates.
Firstly you'll see that i have changed my rims mostly due to road legallities during registration for this type of build (front track) and i have added some decent tyres. Yokohama A048R's. :-D
I started installing headlights, indicators, bumpers, grill, tailights and bootlid.
Its starting to take shape now!
I had planned for a gas strut bonnet setup since back in the body work days and had seen this done a lot. There were different ways of doing this using a single long strut but i really liked the dual mini strut on each side. Although there wasnt enough information on this i took it upon myself to figure out the right sized gas strut and pressure. I started of measuring the furthest distance the bonnet hinge would tilt back roughly to where i would be mounting the end, and then measuring again at its closest point. I ended up finding the gas strut 250N/100 that was close to my measurements. This part number equivalents to 250mm long and 100mm stroke. One of the biggest issues was trying to find the right pressure as there wasn't much clarification on what people were using. Making the pressure too high could bend or warp the bonnet. I went with 100PSI but i think i was sent 150PSI, not too sure but either way the pressure was just right.
The brackets i made up were of a similar design i had seen on forums so i made these up which were mounted to the bonnet hinges and used the ball cup end fittings that came with the gas struts.
Bracket dimensions are as follows.
The final result is below.
Lastly how it all looked afterwards. Works a treat!!
You'll also notice that i have installed my bonnet support bar. I had removed the standard clubman bonnet unlock lever which was located in the front grill and replaced it with a cable pull kit. This kit did need to be modified to fit the clubman, which included widening the bracket mounting holes and grinding the bonnet pin down a bit.
The main reason for this revision was the location of the plumb back hose from the blow off valve to the air filter pipe. I needed to have a plumb back but also wanted the option to have it atmospheric. The only decent choice was the Turbosmart Kompact for price and size and because there was the option of the dual port model.
I did have to remake a few components this time. The air intake pipe was first on my agenda and i would work my way back from there. I had a Ramflo air filter still kicking around which i had intended using at some stage so i welded it to the end of 90degree bent pipe then welded a new bung outlet for the BOV plumb back. After some brainstorming with a work mate i decided to run a bit of 20mm pipe along the front of the rocker cover as part of the plumb back and use 20mm hose for the join to the BOV. I mounted this by welding some tags to the pipe and bolting it to the head.
The 2.25" pipe bend that mounted the BOV was remade with a simple 20mm bung for hose mounting of the BOV. Then I used some hose spiral to keep the shape of the hose for the pipe to the BOV hosing. I used this spiral stuff on the W2A system also, its good stuff!
Painted and complete. An easy unscrew of the BOV trumpet and a quick swap out with the provided blanking plug turns this BOV into a full plumb back system... vice versa.
Whilst re-installing everything again i revised over some parts and was simply not happy with the way they looked so i decided to invest more time into making these look better.
First up was the Water to Air intercooler system. Everything was reasonably neat but i didnt like the location and the look of the water reservoir and water overflow bottle, so i scrapped them both. The radiator cap was of the design that didn't need an overflow tank which made that easy but i still needed a way to fill the W2A system. I found an inline remote filler cap from frozenboost.com, which had the perfect size outlets for my system and mounted that just off the fuel rail as it needed to be at the highest point of the system, or close to. :P
This replaced the water reservoir and all that was left to do was re-route the radiator to filler cap hose and reconnect the exchanger to the filler cap with some cut up 20mm radiator hose.
As you will see, i modified the photos to include flow directions and the parts used in my Water to Air intercooler system to make things easier to understand or identify.
The complete system
This mod was originally an idea from another member on Ausmini but i could never source enough information from them due to inactivity. That was until another member decided to do the same and from there i took on the job of fitting the original Glanza wiper motor to my mini wipers aswell.
I started by studying how the mini wiper motor worked and took the parts needed to complete this job. The parts needed were the original motor wheel arm, the plastic guide and the wiper motor cable with nut. On the standard mini wiper motor there is a wheel that turns the wheel arm and slides the wiper motor cable back and forth along a channel (see image). I simply measured the distance from the middle of the wheel and the arms pivot point and made up a little bracket to bolt to the Glanza/Starlet wiper motor to replicate the distance travelled by the mini wiper motor cable.
From there i pretty much created a bracket that would bolt onto the Glanza wiper motor mounts and then house the channel which the wiper cable glides on and fix the mini wiper motor cable nut on the end. See below.


Last part was mounting and creating a bit of pipe to bolt into the wiper motor and join to the passenger wiper wheel. This was not the easiest part of the job but i somehow got it to work. I made a small template out of sheet metal and drew then drilled out the holes for the wiper motor mounting feet. I then transfer those holes onto the firewall. This was done because of the wiper motor rotating flange sitting lower than the mounting feet. A hole for the flange itself was also drilled. Once that was done i mounted the wiper motor to the firewall and then trimmed the made-up bracket to fit flush against the firewall, or close to. Next i bent up and flared a bit of pipe i had lying around and then drilled a hole, high up on the firewall for this pipe to fit through. The pipe was bent so that it would attach to the wiper wheel, the hard part of the job. I dont have any photos of this just yet, sorry.
The final firewall mounting position is below. I opted to hide most of the setup behind the firewall for aesthetic reasons.
Just some small build up work.
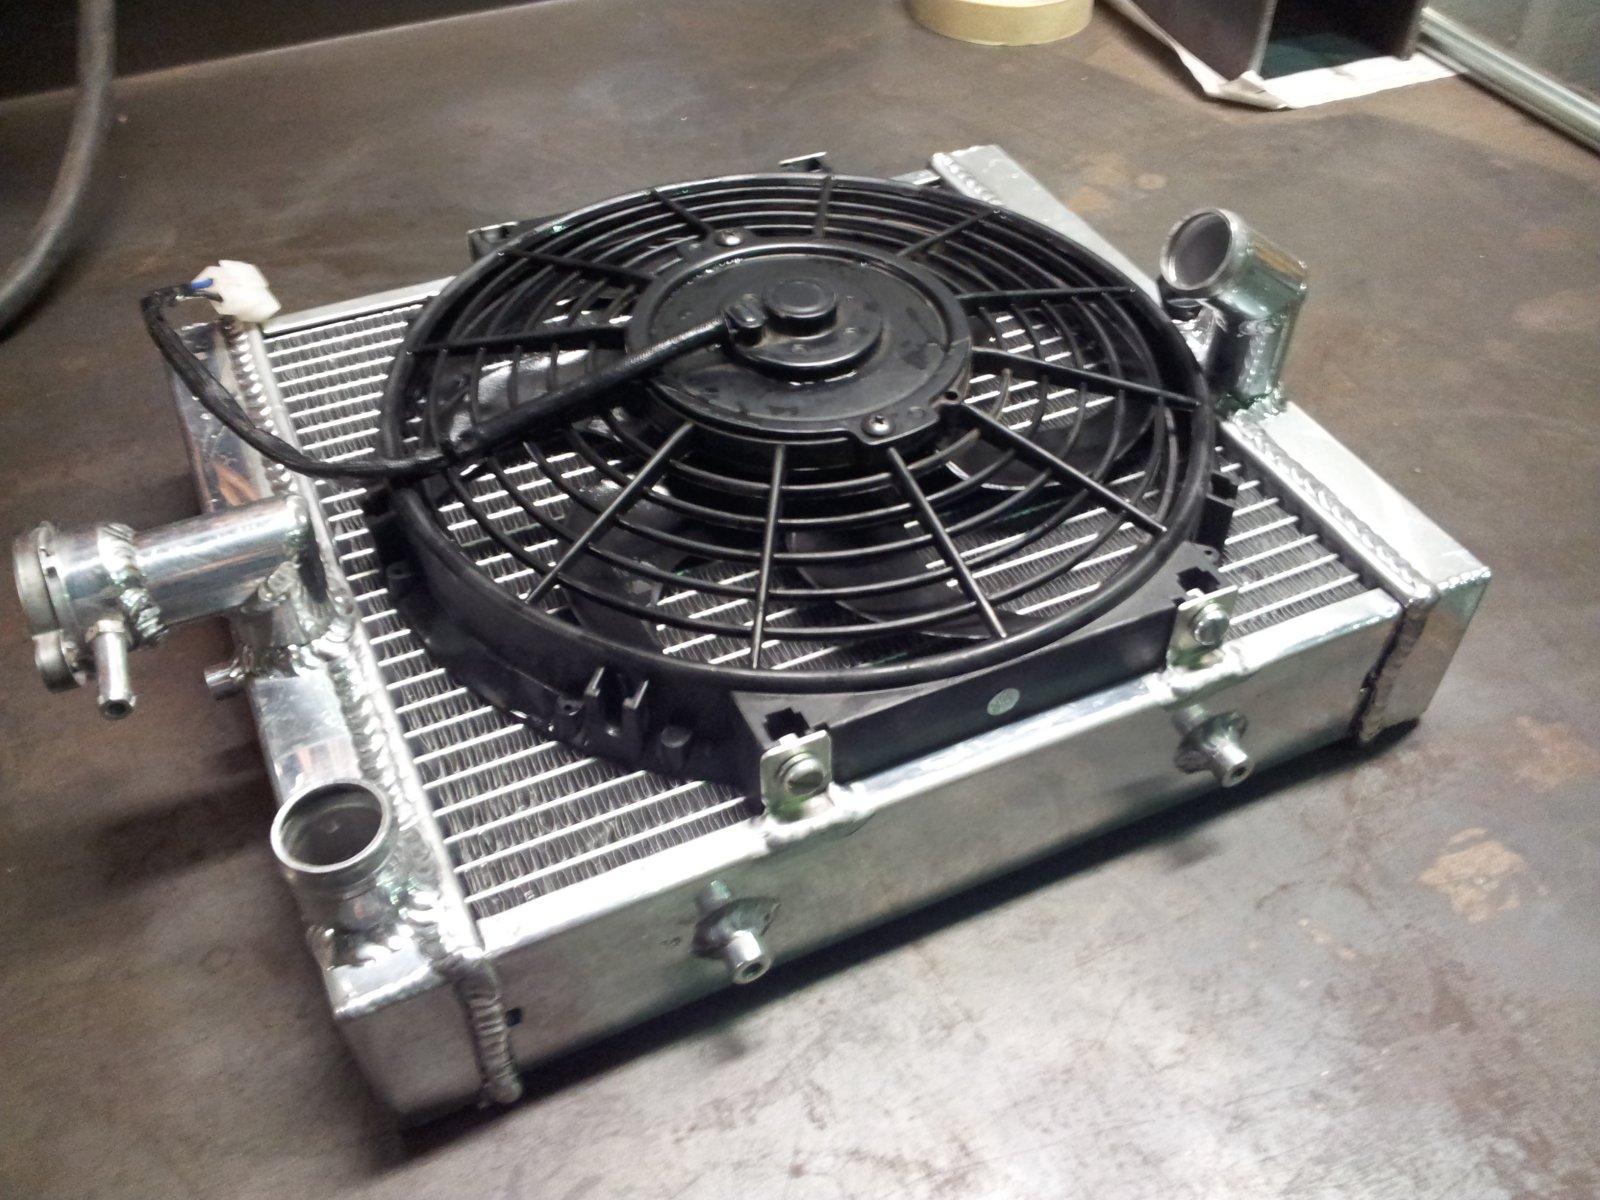
I wasn't really happy with the radiator fan mounting, so i cut up some small tabs and tig welded them on. A much cleaner look.
I also purchased a replacement rocker cover gasket kit just coz. Only cost about $60.
Permaseal brand. Part number: RC3019K